
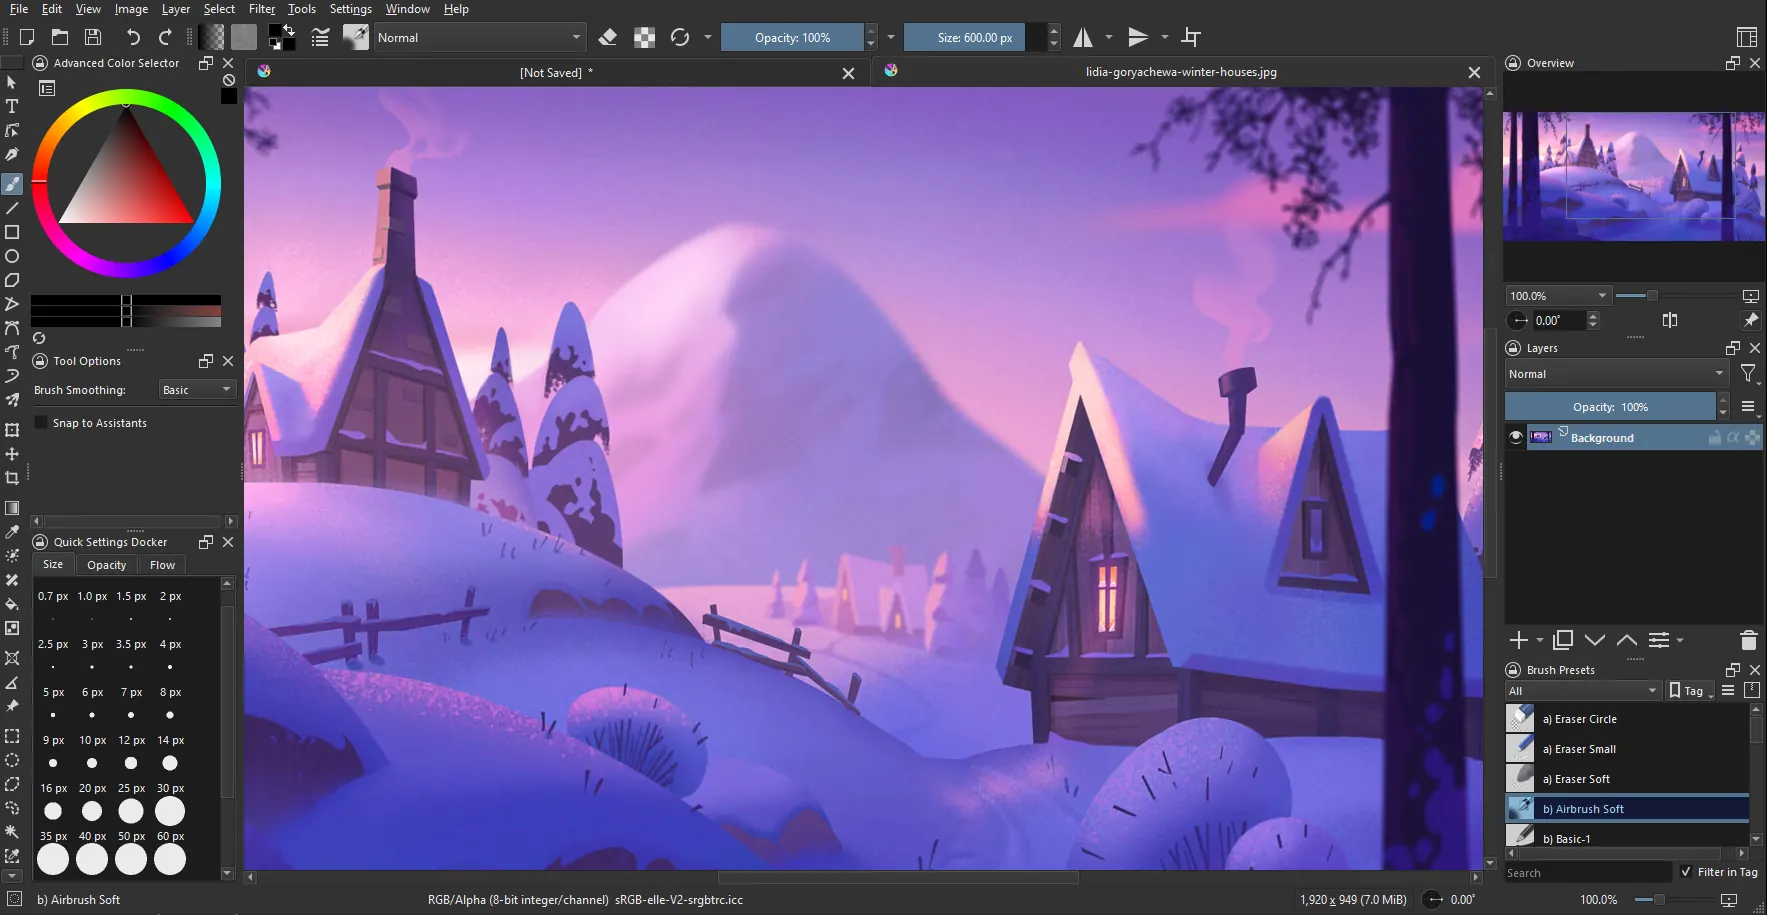
After spending nearly a decade navigating various digital painting suites, I’ve found that the default Krita Interface is a double-edged sword. While it’s incredibly powerful, the “out-of-the-box” layout often feels cluttered, forcing your eyes to travel too far across the screen to find essential tools. This friction kills creative flow.
In my professional workflow, I’ve moved away from the standard setup in favor of a highly modular system. By treating the interface as a dynamic tool rather than a static frame, I’ve managed to shave hours off my production time. Whether you are working on complex concept art or frame-by-frame animation, these layout hacks are designed to minimize cognitive load and maximize your time on the canvas.
Table of Contents
1. Implement Contextual Workspaces
The biggest mistake I see new users make is trying to use one single layout for every stage of the art process. Sketching requires different tools than final color grading or animation. I’ve developed a “Contextual Workspace” system where I switch layouts based on the project phase.
When setting this up, I create three distinct profiles via Window > Workspace > Manage Workspaces:
- The Sketching Layout: I strip away everything except the Brush Presets and the Layer docker. This maximizes canvas space for loose gestures.
- The Painting Layout: Here, I prioritize the Color Selector and the Opacity slider, keeping them within a tight radius of my tablet’s active area.
- The Animation Layout: I move the Timeline docker to the bottom and the Onion Skin settings to a prominent side panel.
Switching between these takes two seconds but prevents the “UI fatigue” that comes from staring at a dozen unnecessary panels.
2. Optimize the Pop-up Palette for Muscle Memory
The Pop-up Palette (right-click) is the crown jewel of the Krita Interface, but the default ring is often inefficient. In my testing, I found that having too many options in the ring actually slowed down my brush switching.
To optimize this, I use the “Favorites” system. Instead of scrolling through the entire brush library, I assign my top 8 most-used brushes to the palette. I arrange them by function: Top for sketching, Right for blending, Bottom for detailing, and Left for blocking. This creates a spatial map in my brain, allowing me to switch tools without even looking at the palette.
3. Master Tabbed Docker Stacking
Screen real estate is a finite resource. If you have your Layers, Brush Settings, and Color History all open as separate panels, you’re sacrificing valuable drawing space. I solve this by “stacking” dockers into tabs.
By dragging one docker header over another, you can create a tabbed group. I typically group my “Technical” dockers together (Layers, Curl, and Group) and my “Creative” dockers together (Brush Settings, Color Selector). This keeps the interface clean while ensuring that a single click brings back the necessary controls.
4. Fine-Tune Interface Scaling for 4K/5K Displays
Working on a high-resolution monitor in 2026 often leads to one of two problems: the UI is microscopically small, or it’s so bloated that it covers the canvas. I’ve found that the default “Auto” scaling often fails in complex layouts.
Go to Settings > Configure Krita > General > Window and manually adjust the Scaling. I typically set mine to 125% or 150% depending on the monitor distance. A pro tip: if the icons still feel clunky, check the official Krita Manual for guidance on how to handle high-DPI settings for specific operating systems to avoid blurring.
5. Create UI Toggles via Custom Shortcuts
The most efficient way to handle the Krita Interface is to make parts of it disappear when you don’t need them. Instead of manually clicking the “X” on a panel, I map specific shortcuts to toggle visibility.
I’ve mapped Ctrl + Shift + L to toggle the Layers docker and Ctrl + Shift + B for Brush Settings. This allows me to enter a “pseudo-Zen mode” instantly. When I’m in the flow of a painting, I can hide the entire UI and bring back only the specific tool I need without breaking my visual concentration.
6. Tool-Specific Docker Visibility
A common trap I’ve seen is keeping the “Tool Options” docker in a fixed, large position. However, the Tool Options docker changes its content based on the tool selected (e.g., the Transform tool shows different settings than the Gradient tool).
I recommend docking the Tool Options in a narrow vertical strip on the far left or right. Because this panel is highly volatile, keeping it isolated prevents other dockers from jumping or resizing when the tool options expand or contract. This maintains a stable visual anchor for your eyes.
7. The “Zen Mode” Configuration for Final Polishing
During the final 10% of a painting—the polishing phase—the UI becomes a distraction. I create a specific “Zen” layout that is almost entirely empty.
In this configuration, I use the Tab key to hide all dockers, but I keep the Canvas Navigation tools active. I also disable the “Toolbox” and rely entirely on keyboard shortcuts for the remaining tweaks. This forces me to look at the piece as a whole rather than focusing on the technical settings of the software.
Layout Efficiency Comparison
| Layout Strategy | Primary Benefit | Best Use Case |
|---|---|---|
| Contextual Workspaces | Reduced Cognitive Load | Multi-stage projects |
| Tabbed Stacking | Maximized Canvas Space | Small screen/Laptop users |
| UI Toggles | Uninterrupted Flow | High-detail rendering |
| Pop-up Optimization | Faster Tool Switching | Speedpainting/Sketching |
Refining Your Workflow
The “perfect” Krita Interface doesn’t exist; there is only the interface that works for your specific hand-eye coordination and hardware. I recommend implementing one of these hacks per week. If you change everything at once, you’ll destroy your muscle memory and actually decrease your productivity.
Start by stacking your dockers and customizing your pop-up palette. Once those feel intuitive, move into contextual workspaces. The goal is to make the software disappear so that only you and the canvas remain.
Also Check: Krita Basics: 10 Ultimate Proven Steps for Newbies 2026
2 thoughts on “Krita Interface: 7 Secret Best Layout Hacks for 2026”