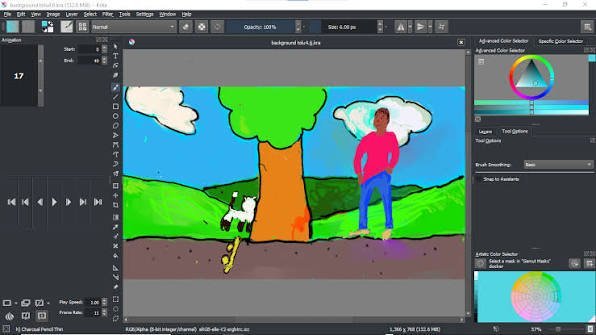
After spending years animating complex sequences in Krita, I’ve realized that most artists treat the Krita Timeline as a simple playback bar. In reality, it’s a powerful engine that, when configured correctly, can cut your production time in half. The biggest hurdle isn’t the drawing—it’s the friction between your creative flow and the software’s interface.
When I first transitioned to Krita for professional frame-by-frame work, I struggled with timeline lag and confusing keyframe management. Through a lot of trial and error (and a few crashed projects), I developed a specific set of optimizations that turn the timeline from a chore into a precision tool. Whether you are doing traditional hand-drawn animation or hybrid motion graphics, these eight workflow hacks are designed to remove the technical bottlenecks of 2026’s animation pipeline.
Table of Contents
1. Customizing the Timeline Workspace for Zero Friction
The default “Animation” workspace is a starting point, but it’s rarely optimal for a high-speed workflow. In my testing, having the Timeline docker occupy the entire bottom third of the screen while keeping the Animation Curves docker visible on the right is the most efficient layout.
To truly optimize, I recommend docking the Onion Skin and Timeline dockers side-by-side. This eliminates the need to jump between tabs when adjusting frame timing. A common trap I’ve seen artists fall into is leaving too many unused dockers open, which eats up GPU memory and can cause the timeline to stutter during playback of high-resolution frames.
2. Mastering Blank vs. Duplicate Keyframes
One of the most frequent mistakes I see in the Krita Timeline is the misuse of keyframes. There is a critical technical difference between creating a “Blank Keyframe” and a “Duplicate Keyframe.”
- Blank Keyframes: These clear the canvas for a fresh drawing. Use these for primary action changes.
- Duplicate Keyframes: These copy the previous frame. Use these for “holds” or when you only need to make a minor tweak to a drawing.
My professional tip: Use Duplicate Keyframes for 90% of your “in-betweening.” It is significantly faster to modify an existing shape than to redraw it from scratch, which maintains better volume consistency across your animation.
3. Advanced Onion Skinning Calibration
Standard onion skinning is often too distracting—too many red and green ghosts cluttering the screen. To fix this, I go into the Onion Skin docker and customize the opacity and color gradients.
I prefer setting a very sharp drop-off for the “previous” frames and a softer fade for the “future” frames. This creates a clear visual hierarchy: you know exactly where you came from and where you are going without the screen becoming a muddy mess of colors. If you’re working on high-contrast line art, try switching the onion skin colors to a neutral blue to avoid clashing with your primary palette.
4. Using Transform Masks for “Fake” Tweening
Krita is primarily a frame-by-frame tool, but redrawing a character just to move them across the screen is a waste of time. The secret is using Transform Masks in conjunction with the Krita Timeline.
Instead of drawing the character in a new position every frame, I place the drawing on a layer, add a Transform Mask, and set keyframes for the mask’s position. This allows you to “tween” the movement while keeping the internal animation (like a walk cycle) hand-drawn. This hybrid approach is how I maintain a high-quality aesthetic without the grueling workload of full traditional animation.
5. Precision Control with Animation Curves
Linear movement looks robotic and amateur. To achieve professional “ease-in” and “ease-out,” you must stop relying on the timeline’s default spacing and start using the Animation Curves docker.
When I set up a movement, I immediately jump to the Curves docker to manipulate the Bezier handles. By flattening the curve at the start and end of a movement, you create a natural acceleration and deceleration. This is the difference between a “stiff” animation and one that feels organic and weighted. For more on the mathematics of this, the concept of interpolation is fundamental to understanding how these curves function.
6. The “Bucket” Layer Grouping Strategy
A cluttered layer stack is the fastest way to lose track of your Krita Timeline. I utilize a “Bucket” strategy: grouping all elements of a single character or object into a folder.
| Layer Group | Content | Timeline Use Case |
|---|---|---|
| BG_Group | Static backgrounds, distant clouds | Single long keyframe (no animation) |
| Char_Main | Line art, flat colors, shading | Active frame-by-frame sequence |
| FX_Group | Dust, sparks, glow effects | Fast, low-frame-count loops |
By grouping these, you can mute or lock entire sections of your animation, reducing the cognitive load as you focus on one element at a time.
7. Audio Scrubbing and Syncing
Syncing animation to audio in Krita can be frustrating if your file formats are wrong. To avoid lag in the Krita Timeline, I always convert my audio to WAV format (44.1kHz, 16-bit) before importing.
Once imported, I use the “Audio Scrubbing” feature. Instead of playing the whole sequence to find a specific beat, I manually drag the playhead across the timeline. This allows me to pinpoint the exact frame where a sound peak occurs, ensuring that the visual “impact” frame hits exactly on the audio beat.
8. Zero-Loss Exporting via FFmpeg
The final hurdle of the Krita Timeline is the export. Many beginners try to export as a GIF or a series of PNGs, which is inefficient. The professional way is using FFmpeg.
When setting up the FFmpeg render, I avoid the default “low” settings. I recommend selecting the H.264 codec with a high bitrate to ensure that the gradients and line work don’t suffer from compression artifacts. A pro tip: always export a low-res “proxy” version first to check the timing before committing to a full high-res render, which can take hours depending on your frame count.
Optimizing Your Creative Output
Mastering the Krita Timeline isn’t about knowing every single button; it’s about removing the barriers between your brain and the canvas. By implementing custom workspaces, utilizing Transform Masks for efficiency, and leveraging the Animation Curves docker, you shift your focus from “fighting the software” to “perfecting the art.”
Start by implementing just two of these hacks—perhaps the Transform Masks and the Grouping strategy—and you’ll immediately notice a decrease in production fatigue. The goal for 2026 is smarter animation, not harder animation.
Also Check: Krita Animation: 5 Effortless Pro Steps to Learn 2026
2 thoughts on “Krita Timeline: 8 Secret Best Animation Hacks 2026”